Showing posts with label bows. Show all posts

March 7, 2012

thank you! congratulations! feel better!

i have a new craft love....

cards

i used to spend sooo much time and money picking out and paying for cards, respectively. i like my cards to look a certain way, which usually means i paid about five bucks a card.

argh. 

but i have recently come to understand this very simple craft equation

blank card + scrap fabric + fabric glue = any card i could ever want on the cheap

hello?!?! best formula ever!


and i particularly needed some thank you cards lately (when do i not need cards for something? i always need cards: exhibit a, b, and c)


jason used these cards, but i am planning on finally using the cards i make for myself. one day!


sorry fo the dark pictures, we are actually trying to figure out how to make our house more brightly lit, and less like ambient lighting


it's great when you are sleepy, but when i am trying to study and stay up late and we got the ambient lighting going on.....i die. and not in the awesome rachel zoe kind of way.


but since we are in an apartment, we can't put anything permanently on the walls so.....more floor lamps? that might be awkward


maybe we should just carry flashlights everywhere. and shine them where we need more light


oh and can i pick a favorite? these are just cards, not my future children, but i sometimes feel bad about choosing a favorite even out of my crafts. don't hate me.


oh y the way, this is my favorite. it's just....i mean.....i am addicted to bows. i can't help it. i have never liked bows until two years ago. strange? maybe.


now i just need some elegant awesome handwriting and these would look totz rad


totz. rad.


so now that we have covered overpriced cards, my home's bad lighting, and picking favorites.....
which one is your favorite? it's okay, i won't judge :)

December 21, 2011

a handmade christmas


the great recession + overly expensive goods =
a handmade christmas

and if you are in a bind, here are ten quick gifts to finish of your christmas gift list!

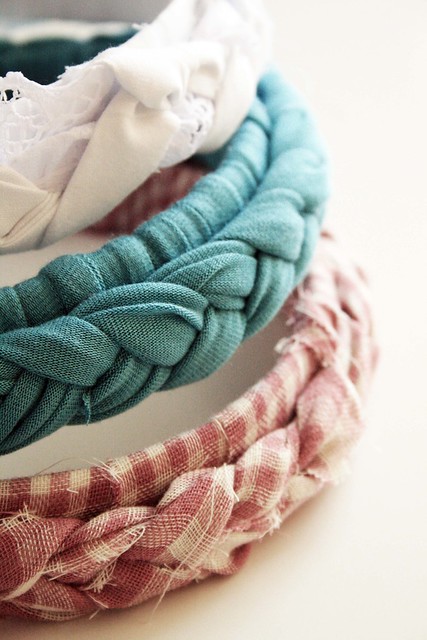
braided headband (for women and children) so cute, and so easy. it's also a great way to use some of your scraps!
IMG_6886

flower bib necklace (for women) this necklace is so classy and looks expensive. your giftee would never know you made it!

animal hats (for children) so, so cute. and a free pattern! this could also be made for teens/young adults


infinity scarf (for men, women, children) perfect for any shape, size, or gender, infinity scarves are perfect because it is FREEZING outside. and they are really cute.

braided scarf (for women and children) a slightly more sophisticated version of the infinity scarf, the braided scarf is simple yet refined. 

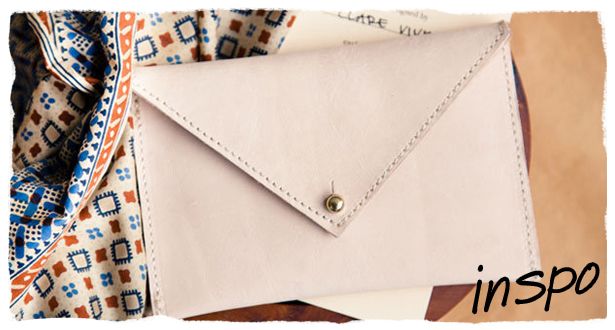
envelope clutch (for women) ok. this is one of those diy gifts that does not look diy at all. any woman would love to get this as an addition to their closet
Photobucket


bow belt (for women and children) while this does require some knowledge of the person's waist size, this gift is so cute. as in, if you have extra time while making your gifts (because how doesn't just have loads of free time during the holidays) you can go ahead and make me a few. i have been nice all year, i swear!
DIY: Bow Belt


bath fizzies (for men, women, and children) while the some of the ingredients may not be laying around the house (like essential oils or a pipette), this gifts is so easy to personalize it is worth it to buy some of the ingredients. have a coffee lover? make the fizzies smell like coffee! how about lemon? same thing! plus, who doesn't want to take a long, relaxing bath after the holidays?!


the 'rollie pollie' (for everyone) basically a bean bag filled with soft cotton stuffing, the rollie pollie is an awesome way to add seating to any room, but also a great way to relax. know someone that wants a lovesac? just make them a huge rollie pollie. they will thank you :) hahaha


and if you haven't found anything you like here, go on over to tipnut's diy gift list. there are tons of gift ideas and tutorials, just in time to finish up your gift list!

and with that, i wish you happy crafting! and i will see you friday when we talk about different ways to wrap these precious gifts!

by the way, what gifts are you making this holiday season?
i would love to know!

August 8, 2011

PETER PAN

let me start off my saying that crew necks just aren't fun or good or anything like that. 
it looks like the fabric is trying to eat your neck......

moving on

remember this peter pan collared shirt i made for granny chic week? well, here is a reminder. i was asked to make a tutorial for peter pan collars and how convenient....i have been wanting to copy this shirt from modcloth
so today we are taking this
and making it into this

and we are off!
you will need:
a crew neck shirt
white fabric (or whatever you want)
a colorful scrap

ok!
1. cut off that crew neck! you know you want to!

it already looks ten times better...

2. measure your neck hole. yes, neck hole. mine was about 23", but remember that we do not want them to meet in the front, our bow is gonna cover the middle instead

3. bust out that white fabric. take your neck hole measurement, add a seam allowance, and BAM. now, for the width of the collar, cut up about 7.5" to 8" 

4. take that rectangle and fold it in half to make a tube. 

5. cut the tube in half like this (go with it people)


6. pin your two tubes, making sure the ends curve like this


7. sew both tubes

8. pull your tubes rights side out and marvel in all their glory.

9. putting right sides together, pin the two unfinished edges of the tube like so
*make sure to make the bottoms line up perfectly, the top isn't as important*


10.sew

11. yay! you have your collar! so, take your shirt and pin the right side of the collar to the wrong side of the shirt, it should look like this.


12. sew your collar on your shirt. take some time, the neckline is curvy!

13. pull your collar right side out and BAM. you are peter pan.

14. time for the bow. i didn't have any mustard colored fabric (so bummed) so i found some pink. eh.

15. cut a 4.5" by 4.5" square and three smallish rectangles like this


16. fold the square in half and sew it like this. turn it right side out


17. fold your little rectangles and half and sew three tubes

18. pull the tubes right side out and you have made the bow's legs and the center tie

19. bust out some glue, pleat your bow, glue on the center tie

20. glue the bows legs together and put glue on the top so it can stick to your bow.

21. voila! your bow!

22. now, i do not want this bow on there forever so i put a snap on it so i can have interchangeable bows. of you do not want to do that, hand stitch your bow on with thread that matches your shirt. if you want to add a snap, stitch it in the center of your shirt's open area and sew the other piece to the bow and oh snap!!
YOU ARE DONE. and you just totally worked the system because you paid barely anything for a $40+ top. go you :) 


looking back on it, it might be easier to curve the neckline if you want the collar to  lie flatter, but that sounds a little to hard for me. hahaha if you finish the tutorial, send me a picture or link to show me your shirts! i would love to see your creativity at work :)


July 28, 2011

classy, classy bow ties

well hello everyone. i am going to teach you how to make bow ties for li' boys and grown men. yesssss

and off we go!
you will need
1/4 yard of fabric
some velcro
craft glue

1. measure an example for neck length and width. if an example is not available, measure around the person neck or even look it up online (from what i found, grown men are around 20" and little boys around 15"). the standard collar size (or neck width) would be 1" for a grown up and about .75" for a little boy.

2. cut a piece that works with your measurements, but make it about 1-2" longer than normal for room for the velcro (don't forget your seam allowance too!)


*for example, my little bow tie needed to be 13" long, i added 2 1/2" for velcro and 1/2" seam allowance, so i had a 16" band. the man bow tie needed to be 21", so i made my final band size 23".*


3. you can create the neck band two ways: A- sew a tube and turn it right side out using lots of patience OR B- you can glue it together. your choice :)

4. set the band aside to create the bow. here is a great tutorial on how to do it. don't attach the center tie on the bow, that will come later. remember, this is going right under a chin, so don't make it too big!

5. use the band to attach the bow to the band. i used glue, and it worked pretty well. remember to measure it to be in the center of the bow tie.


6. add some velcro! i had some sticky stuff, but if you have just normal velcro, just stitch through it to make it secure. 

7. voila! so flippin cute! ahhh!!!!!


8. with the extra fabric, make yourself a matching bow. sooo cute!

so is anyone out there as obsessed with bows as i am?! i almost want to just WEAR a bow tie.....hahaha