October 31, 2011

feeling stripey

first and foremost,
HAPPY HALLOWEEN!
candy candy candy!
i am eating Boo Berry for breakfast!
which is probably the worst cereal for you, but i don't care
i'll let you know tomorrow if anything happens....anything ghoulish or amazing :)

so, i have been eating kit kats lately (i am eating one as i type) because they make my crazy busy life seem easier. or at least sweeter. but what i have noticed is that halfway through studying my kit kat is half gone. and i always get really, really sad. and i turn to my jason and say
"jason, i am sad because my kit kat is already half gone"
and being very philosophical he replies
"you must be a kit kat half gone kind of a person"


but is there any other kind of person?! 
i mean with water, if it is half empty, who cares? just go fill it up in the sink. but a kit kat...i mean...that is precious. it should be cherished, stick by stick.


alas....my kit kats are all gone now. so i will sew
(super random tangent: my one pet peeve about sewing is that i cannot eat chocolate at the same time because i will get it all over whatever i am sewing. come on, that makes sense right?)


ok, enough of the chocolate craziness, and on to the refashion!


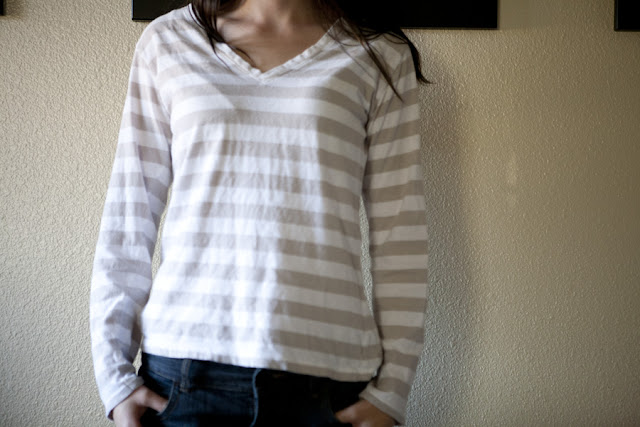
this beaut came from my good ol' buddy sarah and oh my goodness when i saw it i was so excited! grey! yes! 
slight problem: too big for me


my solution: take it down a notch

so i did


amazing what taking an inch off of each side can do...


i am wearing this. everyday if i can get away with it.


the stripes will distract them right?


am i the only stripes fan or are you guys lovers of this pattern as well? 
do tell!
October 28, 2011

look at this stuff, isn't it neat?

so, remember when i said that my mom had given me a bunch of clothes?
well i wanted to give you a sneak peek of what we will be doing so you can gather your need-to-be-refashioned clothes and we can get a move on!


when i was looking through the clothes and picking what i wanted, i kept thinking how much better this was than shopping. and i realized, it isn't just about the money aspect (ya know, everything being free) but i actually like these clothes more because my mom owned them.
is that odd?

i think not. these clothes not only look cute and i can make them entirely my own, but it's like i am carrying around a little piece of my momma with me wherever i go. 


creepy? yes
clingy? yes
awesome? always.


oh and here's a picture of my momma when she was little

MOST AWESOME PICTURE EVER!

she hates me now. i'll just wait for the call telling me to take the picture down...i'm not doing it mom! you can't make me!

i hope you guys are as excited about these projects as me, because i am seriously excited. like. srrsly.


oh and i'm KIND OF excited for it being almost the weekend and everything. any fun plans?

October 27, 2011

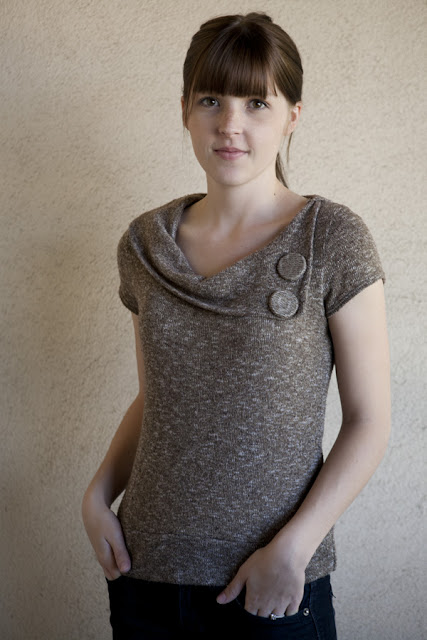
cowl me anytime

i have always thought that cowl neck tops are for adults.
and then i realized i am an adult.

   i always hate when i realize that.....

anyway, when my amazing friend sarah gave me this top, i was like okay, let's act like an adult now!


and while this is definitely cute (oh my gosh you goys, it feels like a snuggy. so flippin soft) i needed to make it more me/make it fit better


and i think i succeeded

alrighty here we go. you will need

a knit top you want to change
two large buttons

1. i removed the elastic-y bottom with a seam allowance on top. i then cut it a little shorter so it would hit me at the hip and not past my bum (ha, bum!) now, keep those scraps we are gonna need them


2. with the shirt right side out, pin the elastic-y bottom to the outside. remember to pin below the original seam so it doesn't show
above

flat

3. (optional) take in the sides :)

so now it fits. yay!!! but i can only adventure so much in my wardrobe and i have never really been able to pull off hardware on my clothing. these two washers are the culprits


so....i had to cover them. here is where those scraps come in!

4. get two buttons larger than the area you need to cover


5. place the scrap underneath and cut a circle around each button


6. hand sew an asterisk-shape across the back of the button (sew one side to the opposite side and continue)  until the the entire front is covered and taut


7. sew these buttons over the intended area by going around the area (in my case, a washer) and oh my lanta.....

look at you :) (or me, really)


you covered the hardware with chic, matching buttons. yay!


not gonna lie, i was totally winging this. i had never covered buttons before, and i pretty much had no idea how i would fix this top. and that is why i have confidence in all of you! because i have no idea what i'm doing, and look how good that turned out :) hahaha

October 26, 2011

a white top wardrobe

as a teenager, i used to make fun of my mom for having mostly white shirts. and she wore white shirts all of the time; not the same type mind you, but all different types of white shirts. scoop necks, crew necks, v-necks, embroidered tops, peasant tops, and all of them were white. as a teenager, i mocked her for her abundance of white shirts

i looked through my drawer the other day....and i have mostly white shirts. and no two are the same! and now i am adding this glorious, glorious top to the my white top wardrobe....


when i pulled this top out of the donated pile of goodies, i saw potential IMMEDIATELY. so it had some flaws: too big, some see-through parts, too low of a neckline, and for some reason i can't pull of elastic bottom shirts. i don't have enough of a curve to make it look cool. so i set out to make this top my new favorite white top

and i did!

here is how i did it

1- cut off the elastic casing on the bottom and on the sleeves. it allows for a better overall flow with the fabric


2- see this low neckline? sew it straight up with a whipstitch until it is at a point where you feel comfortable


3- turn i inside. remember when we lined this top? we are going to use the same method on this one! find some matching fabric scraps and place it over the area you want to cover. pin and sew (i sewed it by hand, it was easier)


4- take in the arm holes. mine were just too big, so i pinned like this


and sewed it right up!

WOWZAS!

gotta love my weird bangs cowlick....and no more see through action!


it looks like a totally different top! oh, and did i mention it is super duper comfortable?

so comfortable after i finished sewing, i went to lay down in bed for a little bit and fell asleep with it on. oh yes, this is a day to night transition top for sure.


have you ever bought/received a piece of clothing that looked not so good, but you saw the potential and made it fabulous? tell me about it! even better, send me a picture or link it below!

October 24, 2011

weekend recap

this weekend jason and i drove down to orange county to go through the temple with my brother dennis
it was pretty awesome

all of the family was together...(well part of us anyway)

and we got to hug the missionary to be!

i know i know....you are jealous of jason's face

of course, the wind thwarted my bangs....hahaha

my mom also cleaned out her closet, so i got two bags full of her clothes to refashion...yay!

besides the driving and traffic, it was a fantastic and relaxing weekend filled with family :)
now back to the daily grind!

anyone out there do something fun this last weekend?

October 21, 2011

stricken

i have been stricken down with a sickness
and despite having health problems that i deal with on a daily basis, whenever i get a cold or flu, i am a MESS
example:
jason came home from work and i was sitting on the couch crying. why you may ask? oh, i thought that i would make a bad mother one day

you know, something really relevant like that

and since i have been so sick, i haven't had time/energy to take pictures of upcoming refashions! but, i wanted to give you guys a taste of what we will be refashioning next week...so here we go!

we are doing....TOPS


all given to me by the fabulous sarah


so go have a fantastic weekend 
and look forward to these refashions lovely people!

October 19, 2011

giveaway pillow + fixing a white shirt

so
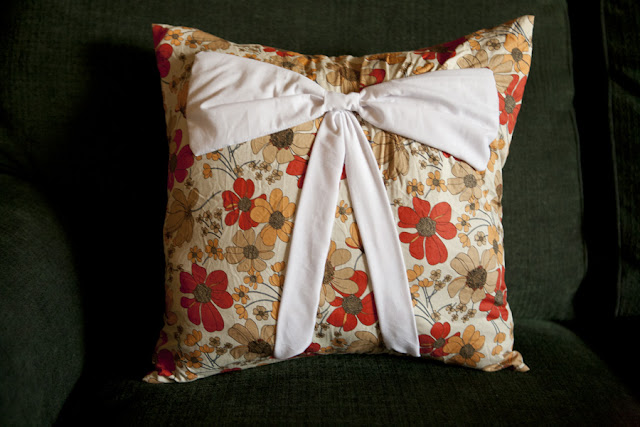
after a long wait (sorry madison!) i finally got the giveaway pillow out in the mail yesterday! and i think the winner is going to LOVE it! here are some pictures i snapped of it before i sent it off....


of course i realized i didn't have a 16x16 pillow form, so i just used a blanket


congrats again, madison!


 keep reminding your friends, families, pets, and strangers to become followers so we can have another giveaway :) only need about 25 more followers until the next one!

on another note
 a friend of mine recently asked if i wanted to have a white button up shirt of his to refashion. i asked why he didn't need it anymore because i know well-fitting white shirts are hard to come by. he confessed it was one of his favorite white button ups and it had snagged on the hanger and ripped!!!


AHHHHH!!!!!!! THE HORROR!!!


but don't worry i'm here to save the day. after all, fixing rips is how i first starting sewing :)

so i did a small and close whipstitch over the damaged area and it ended up looking like this


mucho better right?

while fixing this rip, i was reminded of my freshman year in college when i had a friend (or really, a friend of a friend) who always ripped his buttons and clothes while skateboarding
i got sucked into doing all of his mending by walking into my dorm room one day and finding my room mate destroying one of those circular red needle cases like this
(minus the heart shape)

she had broken it in half with a screwdriver
i laughed really hard
(i still laugh....hahaha)
anyway, i just sewed his rips and tears pretty much on a weekly basis because it's hard to not get into skateboarding accidents when you are high or drunk
and since i go to ucsb, this is actually a pretty common occurrence

moral of the story:
if something is ripped, torn, or stained, and you love it, don't get rid of it. just fix it :) your clothes will love you for it! also, move the clear circle clockwise on a needle case until one falls out instead of smashing it

have a great wednesday!

October 17, 2011

how halloweeny

i know what you're thinking....halloween is like two weeks away?! why so early?! welll i want you to have enough time to find a too-big-for-you orange shirt somewhere. and i'm not gonna lie, orange is kind of a hard color to find....


this used to be my mother's shirt, i simply made it smaller by taking the sides and sleeves in. i could have ended it there, but i was feelin' daring so i tried to think of something fun

at first, i was excited to have a new top. then i looked at my pile of scraps and the debate
keep the scraps?
throw away the scraps?
make something out of the scraps?

ideas flew across my head: bows, flowers, necklace, pom poms, and the list went on. sometimes i can't really control what's going on in there....


i finally decided on ruffles. yes. i made the neck ruffle with the side scraps.


with non-matching thread, i

took the scraps and sewed them together to create a long rectangle

then, i folded my large scrap in half lengthwise to create a tube. then i did a loose, wide stitch to create the ruffle


next, i pinned the ruffle to the neckline. there is no need to turn the tube inside out because the knit won't ravel, and the ruffle hides the unfinished edge pretty well. it doesn't even look unfinished :)


i actually did all of this by hand, because i was scared of my sewing machine. hahaha this was a project i actually did months ago, so i didn't know how to make a ruffle on the sewing machine. everyone's gotta start somewhere, right?


if you could find an orange shirt, this is perrrrfect for halloween! it reminds me of pumpkin spice...i feel like a little piece of fall walking around


do any of you dress halloween-y or christmas-y for the entire month before?

i do :)