Showing posts with label fabric. Show all posts

March 7, 2012

thank you! congratulations! feel better!

i have a new craft love....

cards

i used to spend sooo much time and money picking out and paying for cards, respectively. i like my cards to look a certain way, which usually means i paid about five bucks a card.

argh. 

but i have recently come to understand this very simple craft equation

blank card + scrap fabric + fabric glue = any card i could ever want on the cheap

hello?!?! best formula ever!


and i particularly needed some thank you cards lately (when do i not need cards for something? i always need cards: exhibit a, b, and c)


jason used these cards, but i am planning on finally using the cards i make for myself. one day!


sorry fo the dark pictures, we are actually trying to figure out how to make our house more brightly lit, and less like ambient lighting


it's great when you are sleepy, but when i am trying to study and stay up late and we got the ambient lighting going on.....i die. and not in the awesome rachel zoe kind of way.


but since we are in an apartment, we can't put anything permanently on the walls so.....more floor lamps? that might be awkward


maybe we should just carry flashlights everywhere. and shine them where we need more light


oh and can i pick a favorite? these are just cards, not my future children, but i sometimes feel bad about choosing a favorite even out of my crafts. don't hate me.


oh y the way, this is my favorite. it's just....i mean.....i am addicted to bows. i can't help it. i have never liked bows until two years ago. strange? maybe.


now i just need some elegant awesome handwriting and these would look totz rad


totz. rad.


so now that we have covered overpriced cards, my home's bad lighting, and picking favorites.....
which one is your favorite? it's okay, i won't judge :)

January 25, 2012

happy birthday to you.

yay! cards are so much fun to make! and so easy.....and way cheaper than their store-bought counterparts
like this one 
and since birthdays happen so often, let us make a birthday card. ya?
sorry for the bad lighting :)

so you will need 

a card + envelope
scissors
pencil
two coordinating scraps of fabric
glue
pen
small piece of thin elastic or elastic thread

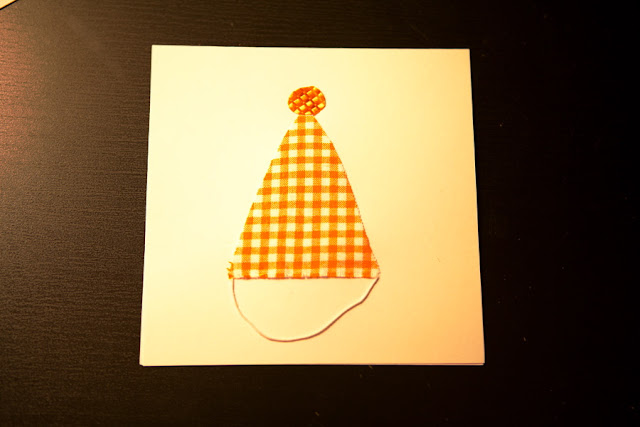
1. cut out a triangle

2. glue it to the card

3. take the other piece of fabric and cut out a circle. glue it on.

 4. take a small piece of elastic/elastic thread and glue the end underneath the triangle

AH! SO CUTE! take that papyrus!

optional: i then cut out a little heart...

 and glued it onto the envelope

even cuter!!! ah!!!!

oh and guess how long it took? MAYBE five minutes. with taking pictures. so i'm gonna say like two minutes. 


cheap. fast. easy. awesome.
that's my craft motto :)


so try this out, and let me know how it turns out!
happy crafting!

January 16, 2012

action shot!

remember this bunting i made?
remember when i said i would show it in action? 


SCHWING!

BAM!


WHAM!

obviously action shots :)
my friends' wedding was AWESOME. jason was the photographer, and i am so excited to see how they turn out!
ah!
in other news, i went to the mecca. and guess what? i went to michael levine and
i was so disappointed.

there was nothing! it was like scraps of fabric. and not even nice fabric! just random crap.

so sad.

so i found some white, off-white, light grey, and dark grey cotton. nothing special

thanks a lot michael levine.

January 13, 2012

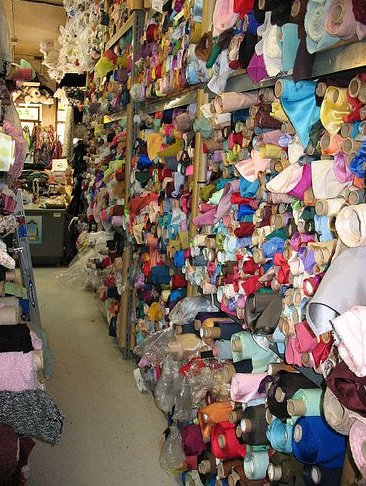
mecca to the holy land

of fabric.

yes that's right, i am going to the LA fashion district. 
and it will be glorious.

i'll update you on my finds when i return!

what are some of your projects/activities for the weekend?

January 9, 2012

books and buntings, buntings and books

school is back!!!

which means i will be more stressed out, which means i will be sewing a lot more. which is both good and bad...(good for the sewing, bad because of the stress)

anyway, i have been getting my craft on lately outside of my own projects. i feel like a craft connoisseur. it's like "oh hey nicole could you help me craft something?" and i'm like "heck ya! i am confident in my crafting abilities!"

with that said, i helped my friend sarah make a huge bunting for her wedding. and by huge, i mean like thirty feet long. it is awesome. 

we got all of the fabric from the LA Fashion District, and most of it was only a buck a yard, and we ended up only needing less than a yard of all of them.


anyways, would you like to know how to make a pretty sturdy and beautiful bunting garland?

you will need
about a yard of each kind of fabric you'd like to use
some 3" ribbon
matching thread
fusible interfacing
iron
ironing board

1. cut up all your triangles

2. lay out your ribbon across the ironing board

3. cut long, thin strands of interfacing enough to cover one side of the ribbon. iron away!

4. rip of the interfacing's plastic part and start laying down your triangles and ironing them on. you can usually do about four at a time depending on the ironing board

5. fold over the ribbon to cover the top of the triangles and pin down

6. sew!

sorry for the lack of pictures, i wanted to bust this thing out as fast as possible so it could be checked off the wedding to do list

and you're done! 
i haven't seen these in action yet, but when i do i'll let you guys know what they look like!

now, go make this monday great! 

September 19, 2011

plaid-tastic

quick shout out to the people who haven't locked their wifi yet, because i can have internet while mine is down. still. i know, i know, my life is tuff. hahaha

anyways

see this top? 

i liked the way it looked. i love the bow at the neck, the pattern, and immediately thought 

hey i think i could make that...


the statement that creates all of these projects. hahaha
so i made this one


want one too?
here we go!

you will need:
1 yard fabric
needle
thread
6 buttons

1. use an existing top to create the top. fold your fabric in half. fold the existing shirt in half, and while cutting create a kind of cap sleeve. make another piece identical to the front piece

2. take one of body pieces and cut it in half. now, you should have three pieces: a back piece, and two front pieces (see the slight cap sleeve?)
3. sew the sides and shoulders together


4. now, let's make the placket. take a strip of fabric about 5 inches wide and should be the same length as the front cut on your shirt piece. fold over .5 inches on each side like so

6. take on side that you have folded over and place it on the inside of the front cut and pin.


 then sew! it should look like this

7. get the other piece that you folded over and place it on top of the front cut, lining it up with the piece you just sewed. pin it and sewww!


8. placket done! and shirt almost done, great job :) ok, onto the buttons. if you have a button hole foot, that is awesome. i don't. so i did these by hand and it wasn't too bad actually. so, place pins where you want your buttons. space them out evenly. you will want one right at the collar and one near the bottom


i ended up needing six buttons 


 9. using your wonderful and dexterous fingers sew a little rectangle where you put your pin. i suggest making somewhat tiny stitches so the fabric doesn't run


10. using a seam ripper or scissors, cut open your rectangle and you now have a button hole! so go ahead and sew your button right behind it


11. after finishing all six button holes and button placements, i had a kit kat. so go get one. or whatever chocolate you prefer and take a BREAK. because you deserve it!


12. alright, we are almost at the finish line! cut a piece of fabric 4 inches wide and 48 inches long. i cut mine in half on accident. don't do that. hahaha


13. now, just make a tube by folding the fabric in half, pinning, and sewing. turn it right side out

14. pin this yummy little tube around your neck hole (yes, it is a word) and carefully sew it on. when you get to the edges of the neck line, decrease the seam allowance so that it flows out smoothly


15. HOLY CRAP. SO FLIPPIN CUTE.


i put a little piece of elastic in the back to fit my shape a little better, but that is totally optional.

you know what is awesome about this top? it has a HUGE bow on it! right under my face! 
i don't know why but that makes me really happy

and it doesn't hurt that it was freeeee. 
my favorite thing to wear with this shirt:
a cardigan

oh my lanta.
yes.

so go make it guys! i want to see what yours looks like! and please feel free to ask any questions. i looove questions.

ps- only THREE followers until the giveaway begins! i am so excited you guys!

July 25, 2011

pillow me

so, this weekend we have weddings weddings weddings! everyone is getting married! good! so while i am busy, i need your advice. i am making a ton of pillows (by a ton i mean seven) and i want to glean knowledge from your minds. here we go....

i am doing two sets of three pillows that are the same and one that is rectangular. my color pallet- as of now- is red, tan, and white. here are my inspirations....

1. bow pillow in red
(find it here)

 2. bird pillow with tan background, one with all white and two red birds and the other with all red birds and two white birds
(find it here)

 3. white pillow with red writing
(find it here)

4. kite pillow....and here is where i need your help!
(find it here)

i don't know whether to do a...
red background with a white kite
red background with tan kite
white background with red kite

tell me tell me tell me! i need your help :)