February 29, 2012

on hold

so i don't have anything for you today.
nada
nothing
zilch
because here is my current desk/workstation

as you may have notice, there is nothing there. hahaha we are transitioning into new furniture
aka
we are going to make our own desks!!!
i have a cat calendar. what of it?
woo hoo!
it is going to be so awesome :) i'm so excited to do my first wood project! 

yes, a crafter lives here.


February 27, 2012

the 70's never ended...

at least not in my wardrobe
i have owned this shirt since the beginning of high school. i had a thing for three inch lapels in high school
it has made for some awkward photos to say the least

and since i love this shirt so much, i decided it was maybe time to take the lapels. i mean....they almost reached my shoulders

so pull out those too big lapels and let's fix 'em up real quick. all you need is
a seam ripper
matching thread
a needle

so
lay out your shirt nad measure 1.5" out. start ripping the seams from there to the tip

rip the seam upwards until it matches the width of the rest of the collar and stuff the extra lapel fabric inside of the collar
and pin

using your dextrous fingers, start hand sewing the lapel back up, trying to keep your stitches similar in length as the rest of the stitches

and....you're done. the seventies is still lives in the fact that this shirt is 100% polyester (haters gonna hate, i love polyester)

but now you don't have to look down and see that your lapel is getting friendly with the end of your shoulder

have you ever made a really small change to something and it just made all the difference?
do tell


February 24, 2012

OMGZZ!!

you guys!!!!


yay!!!

only ten more until we can do a giveaway :)

i am going to (help) shoot a wedding, so have a wonderful friday and even better weekend!!

February 22, 2012

it's almost here....

so, i have been helping a friend refashion her wedding dress.
it's pretty stellar
this last appointment, we did the top and since we met on a monday everything went wrong. hahahaha i think we cut one of the sleeves four or five times before getting it right

gotta love not using a pattern.... 

but it is turning out pretty rad

and i love me a scalloped edge...

i am so excited for them to get married and to see this dress all done up!

oh and their photographer is a babe ;)

what projects do you all have going on out there? i want to hear about them!

February 20, 2012

all tied up

i received a letter from my brother in the MTC about how excited he was to get a tie that i had made just for him.

yea.....ties are definitely hard to make from scratch. it's the truth.

but i realllly wanted to make dennis a tie so i dealt with it. that's why when you look at the pictures to follow, there will be two different types of fabric because one tie bit the dust. hahaha how embarrassing....

but hey, the failure led to success. i'm down with that.  so, would you like to make a tie for someone?!

yes!!!

let's hop to it!

you will need
an old tie (as a pattern)
half a yard of fabric (you will have a bit extra)
contrasting fabric
thread
some good eyeballs
tons and tons of patience

grab your old tie

 cut it into pieces (only where there are seams though)

 especially those two neck seams

 take the pieces and pin them down on your fabric


 and cut the pieces out


 iron over your tie's tips by folding the bottom up and iron, then continue to the sides by folding, then ironing making a point at the bottom. do the same to your contrasting pieces 

now it gets tricky. you need to do what i call an invisible stitch by sewing through the middle layers of the fabric, not the outside. and it needs to be done by hand

your end product should look something like this

remember those neck seams? well now it is time to connect all the pieces. make sure they line up!

 after sewing those pieces together, fold over the sides and iron them down
\

 then fold the sides over again and iron

 now, to make the tie holder on the back, just take your outlined piece, fold and iron on both sides, and hand or machine stitch the ends like so

 if you want to, embroider your name/logo on the front

 now, for another tricky invisible stitch. you need to sew the two ironed sides together by going back and forth between the pieces without the thread showing. i couldn't take a picture of it because it is invisible. so if you need to just look at another tie you have lying around to see how it is stitched invisibly back and forth

now, pin your tie holder about five inches where your side pieces meet. pin it in place

 and sew the back of it on by hand
lightly iron it into its new found shape....and

WOWZA

look at your tie! ah!!!! so proud 

 a little crooked, but hey i like crooked :)

 love love love


 and some bonus footage of my uber hot model :)
he told me not to use it because his hair isn't done......so silly

i think dennis is going to love it! if i ever get a picture from that kid of him wearing it, expect to see it!

now, go take some time out of your daily schedule to sew up a tie for someone just from you

and have a great monday!

February 13, 2012

valentine's day: not just a hallmark holiday

this year valentine's day actually mean something to me. let me explain.

usually, i get something nice for jay and he gets something nice for me and we eat heart-shaped food. i don't really buy into the flowers, the chocolate (ok, maybe the chocolate), the decor, and all that stuff. i try to shower my husband with love everyday, not just february 14th.

that being said, my husband is doing something really special this year and it makes me really, really happy.

this february, jason is doing a valentine's day giveaway where he will shoot your wedding for $1000 and donate half of the proceeds to Cancercare.org, an organization that assists cancer patients and their families with their physical and financial burdens.

i'm in love. 

so, if you know someone that is getting married, give this offer a gander. not only is the photography well-priced, but half of it will be going to cancer patients.

get married. fight cancer.

and grab that button on my sidebar to spread the word!

have a great monday!

February 10, 2012

oh happy day!

i haven't been getting much sewing done lately because of some major graduate school issues....argh. 

and i was so mad about nothing working out and how tough my life was. i was so mad i wanted to cry.

i was questioning whether this was a sign that i shouldn't go to grad school, or maybe this was just another obstacle that nobody has but me.

and then i remember seeing this poster on pinterest

Pinned Image

and it made me happy :) that and the double fudge brownie ice cream..... :)

upon waking up this morning, i found that the problem has been resolved! completely! no more hassling people over the phone, no more getting really mad, just me having everything solved.

well, at least for now :)

so i am going to enjoy this weekend thoroughly, despite the fact that i may have more problems waiting for me when monday rolls around. 

because if i am so happy, everyone else will be happy too!

now, you go and enjoy this weekend too! have a fantastic friday you lovely person!

February 8, 2012

i've gone a-bunting

we have had our run ins with buntings before here on cola cola island (remember this? and this?), so it should come as no surprise that i finally wanted one just for me. well not really for me, more like my husband for his birthday (which was awesome)


because it is felt, it is nice and sturdy. not all flippy floppy, which i liked.

have a special occasion that you need a bunting for? or just want to make one for fun?

well you will need


(ignore the pinking shears, you don't need them)
assorted colors of felt
a cutting mat (optional)
a rotary cutter (or scissors)
embroidery thread
a hole punch
a sewing machine with a cool stitch setting

let's hop to it!

1. take a piece of felt and cut it in half. use one half to make the size triangle you would like. 
it took me  a bit of snipping and trimming, but eventually you will get your perfect triangle!

2. now use your first triangle as a pattern for the rest. i could fit three triangles on one piece of felt, and i cut cut cut! you will need 14 triangles total for this bunting

3. i used pins to outline the letters i wanted to make. again, this is going to be different for everyone depending on if you want to use lower or upper case letters, or both. once you have pinned your letter outline, sew on a decorative stitch setting. try and pick a stitch that is thick so you can see the letters from afar
remember that perfection is NOT important. so if your p is looking weird, awesome. you made a new kind of p that no one else ever has before. good for you :)

4. with all of your letters sewn, bring out the hole punch and punch two holes on the top sides of each triangle

5. pull out your embroidery thread and basically just thread the letters onto the thread

6. leave about 1.5-2 feet extra one each side for hanging and knot the ends of the thread

7. hang it!

ahhh so cute :)

i want to make a mini one to put across my desk wall....note to self put that on my project list...


if you were to make a bunting, what message would you put on it?

February 7, 2012

party animals

we started jason's birthday off right by running through streamers


like olympians

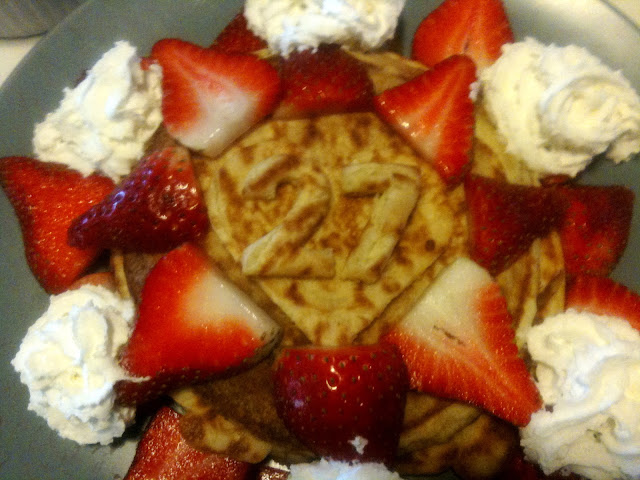
and eating yummy yummy pancakes

celebrating under the birthday bunting
(tutorial coming soon)

figuring out birthday card puzzles 
(which are apparently very difficult)

and ceremoniously opening up presents

oh, and did i mention i made all of this stuff? no big deal.

i think it was a birthday success.

sorry for the phone pictures, i was too busy partying to pull out the canon :)