i looooove ruffles. not as much as i love bows, but i do love them. it takes anything from okay to uber feminine in a snap. and that is why i feel in love with this top from GAP, because it has TWO ruffles. around the neck.

so so cute.
so i made this instead.

so fierce.
i added some sleeves because...i wanted to. hahaha and i made it navy because i love navy. who doesn't?
so let's make it guys! let's cheat GAP out of thirty dollars! hahaha
* i somehow managed to delete a few photos on how to make this shirt...sorry! we will have to use our imaginations :)*
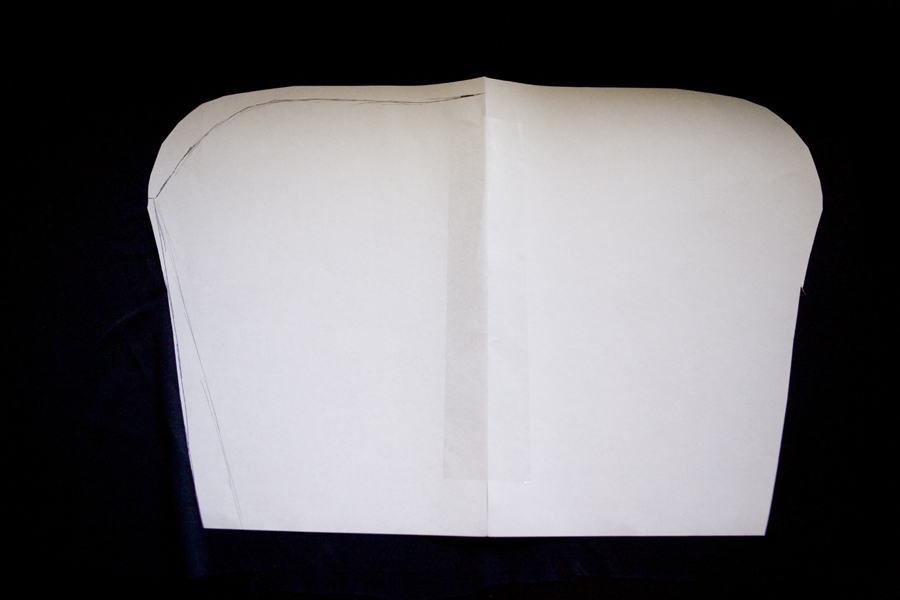
1. you will need a shirt to base this off of. fold the shirt in half and fold the sleeve underneath and cut out the outline of the shirt (remember to leave a seam allowance). also, make sure to make two pieces. don't cut the necklines the same; one should be lower than the other.

it will look something like this.
2. make a model for your sleeves off of your shirt's sleeves. this is what mine looked like. it was a little on the big side, but hey bigger is always better. remember to make two!
3. sew the sides and sleeves of the shirt pieces
4. sew the sleeves together
5. sew the sleeves onto the shirt

and it will look like this! oh my gosh, you just made a shirt. good job :) that is a big accomplishment
and here is where i deleted all of the pictures. also, sorry for all of the math!
alllrighty onto the ruffles :)
this will be like all of the ruffles we have previously made, so don't worry :)
6. measure your neckline. times it by two. add 6 inches. so my measurements were
23 (neckline) x 2 + 6 = 52 inches
it seems like a lot, but we are ruffling!
the fabric should also be 4 inches wide.
7. for the second ruffle, and another two inches. so for me
52 + 2 =54 inches
this fabric should also be 4 inches wide
8. after cutting both of those pieces, set your sewing machine to the lowest tension and stitch length. or, do it my hand by making a long, loose whipstitch. remember reverse stitch only one side because we will need to pull those strings
9. start ruffling. ruffle by pulling one string out and gently pulling excess fabric down the strip. make your first ruffle one inch longer than your neckline measurement. make your second ruffle three inches longer than your neck measurement. my measurements were 24 inches and 26 inches.
10. pin the longer ruffle about an inch and a half to two inches lower than the neckline with the unfinished edge, pin it on, and sew! fold over extra ruffle-age at the end to hide the raw edges
11. take the smaller ruffle and pin it directly into your neckline. then sew it on!
don't worry about the raw edges, we are about to take care of them
12. cut a 1.5 inch wide piece of fabric that is your neckline measurement plus 3 inches. my neckline measurement was 23 inches, so my piece was 1.5 inches x 26 inches

13. fold over each side .5 inches and carefully pin to the neckline and sew it on!
14. you are DONE!

i started taking my pictures with a tripod because my husband photographer was busy...let's just say that i am clumsy with a tripod. hahaha

i feel like this is a party shirt. like, oh hey i am all snazzy at a party. no big deal.

ruffles!!!!
now, go have a fantastic weekend and don't forget to sign up for the giveaway!
I love ruffles too! I have a pixie cut, and I bought a cardigan the other day that has a ruffle all along the collar and front edge, and I just feel so much more feminine when I wear it . It brings out the curl in my hair.
ReplyDeleteI love that final pose, by the way. You look like Captain America. Epic ruffles!