Showing posts with label family. Show all posts

March 19, 2012

the gambo

you know when you become ill out of nowhere and it is not really a cold, not really a flu, not really anything in particular and you just feel like junk all over?

in my family, we call it the gambo (pronounced gam-boo)

so, as i battle through day two of this grossness, i wanted to give you a glimpse of my support group/all i have been eating for two days


notice the lack of food....hunger come back to me! (although i do love me a nice, cold ensure......)

i am trying to get better as fast as i can so i can get back to sewing since our desks are finally done :) 


i am so excited to show you! until then.....have a great monday
i'll be laying on my couch watching legally blonde for the hundredth time

February 20, 2012

all tied up

i received a letter from my brother in the MTC about how excited he was to get a tie that i had made just for him.

yea.....ties are definitely hard to make from scratch. it's the truth.

but i realllly wanted to make dennis a tie so i dealt with it. that's why when you look at the pictures to follow, there will be two different types of fabric because one tie bit the dust. hahaha how embarrassing....

but hey, the failure led to success. i'm down with that.  so, would you like to make a tie for someone?!

yes!!!

let's hop to it!

you will need
an old tie (as a pattern)
half a yard of fabric (you will have a bit extra)
contrasting fabric
thread
some good eyeballs
tons and tons of patience

grab your old tie

 cut it into pieces (only where there are seams though)

 especially those two neck seams

 take the pieces and pin them down on your fabric


 and cut the pieces out


 iron over your tie's tips by folding the bottom up and iron, then continue to the sides by folding, then ironing making a point at the bottom. do the same to your contrasting pieces 

now it gets tricky. you need to do what i call an invisible stitch by sewing through the middle layers of the fabric, not the outside. and it needs to be done by hand

your end product should look something like this

remember those neck seams? well now it is time to connect all the pieces. make sure they line up!

 after sewing those pieces together, fold over the sides and iron them down
\

 then fold the sides over again and iron

 now, to make the tie holder on the back, just take your outlined piece, fold and iron on both sides, and hand or machine stitch the ends like so

 if you want to, embroider your name/logo on the front

 now, for another tricky invisible stitch. you need to sew the two ironed sides together by going back and forth between the pieces without the thread showing. i couldn't take a picture of it because it is invisible. so if you need to just look at another tie you have lying around to see how it is stitched invisibly back and forth

now, pin your tie holder about five inches where your side pieces meet. pin it in place

 and sew the back of it on by hand
lightly iron it into its new found shape....and

WOWZA

look at your tie! ah!!!! so proud 

 a little crooked, but hey i like crooked :)

 love love love


 and some bonus footage of my uber hot model :)
he told me not to use it because his hair isn't done......so silly

i think dennis is going to love it! if i ever get a picture from that kid of him wearing it, expect to see it!

now, go take some time out of your daily schedule to sew up a tie for someone just from you

and have a great monday!

February 7, 2012

party animals

we started jason's birthday off right by running through streamers


like olympians

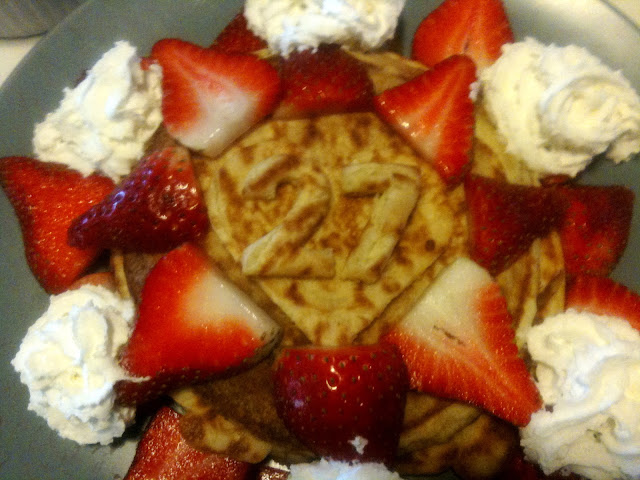
and eating yummy yummy pancakes

celebrating under the birthday bunting
(tutorial coming soon)

figuring out birthday card puzzles 
(which are apparently very difficult)

and ceremoniously opening up presents

oh, and did i mention i made all of this stuff? no big deal.

i think it was a birthday success.

sorry for the phone pictures, i was too busy partying to pull out the canon :)

January 23, 2012

a beauty from a beast

every year, each of the messick men get a t-shirt from their grandparents. i guess they are supposed to use it when they are being manly or pumping iron or some other man activity.

however, when i saw this in our stocking this year, i was like, " oh my gosh! a new shirt! i'm so excited!" 

i think it was like a 2XL. just my size :) so i got to deconstructing this bad boy and made it into quite the lady
wanna make one? huh huh huh?
in california, these shirts are everywhere. just find some crew neck t-shirt or steal one from your significant other and let's get down to business!

 you will need
an oversized crew neck
a shirt you own already own and like the fit of
four buttons
thread

 1. lay out a shirt you own and like the fit of and line it up to your shirt.

 2. pin it down 

 3. cut off the excess bottom fabric and save it

 4. cut off the sleeves at the seam and save them

 5. pin the sides and sew!

 6. cut off that nasty crew neck

7. cut down the huge sleeves to match the sleeves on your fitted t-shirt

8. pin your new sleeves and sewwww. then pin and sew them back onto the shirt body. hem the bottom of the shirt and the sleeves if needed.

 9. now onto the collar. muahahaha. i wanted a collar that went all the way around the neckline, so i drafted my own pattern. i found a pretty good tutorial for it here. ( ignore everything except the drafting unless, you want a triple collar) so, draft out your own collar. mine looked like this

make sure to leave a seam allowance. i also made a draft for the back, but i forgot to take a picture. sorry!

10. take that scrap from the sides or the bottom and fold it in half. cut two pieces.

11. to make the back of the collar, just draft a semicircle that is the thickness of the front collar draft. 

 12. sew the pieces right sides together, leaving a part open to flip it inside out. then, taking your two front pieces and your one back piece pin them onto the collar, like from this tutorial. (ignore the fact that i thought i made a peter pan collar....i was young and naive hahaha)

it should look something like this

13. now that the shirt is smaller and the collar is finished and sewn on, onto the placket. the buttons i used are from a shirt my mother-in-law had. thanks ruth!

 14. so to make the placket, just take a scrap piece and turn over the sides to make a rectangle and sew it on
it should look something like this

15. sew on your buttons and.....voila!

sorry for the inside shots, it is pouring outside!

i seriously love these buttons. so flippin cute.

and who would have thought the beast could be turned into a beauty....

so what do you guys think? a successful refashion or what?

so go find a crew neck and show it who is boss!

and have a magnificent monday!!!